
How do you create an auto-attendant on VoiceStream BT Cloud Voice?
First of all log in to the business portal and navigate to sites
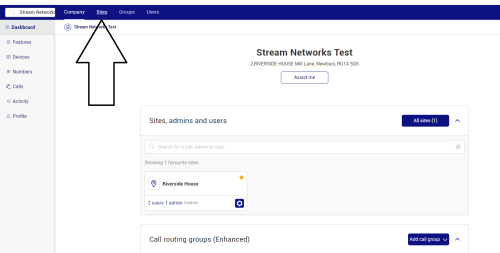
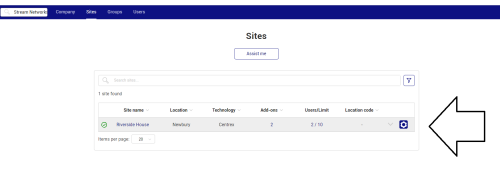
Then click on the cog of the relevant site you want to amend
In the next screen you need to scroll down to the hunt group and auto-attendant section. Ideally with an auto attendant you want some call groups set-up before you create the auto attendant so the attendant can direct its options to the relevant group.
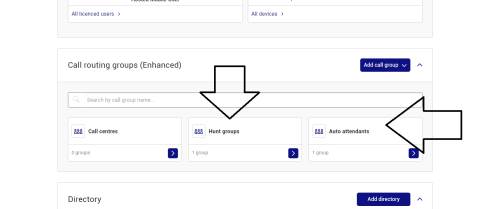
VoiceStream BT Cloud Voice Hunt Group Set-up
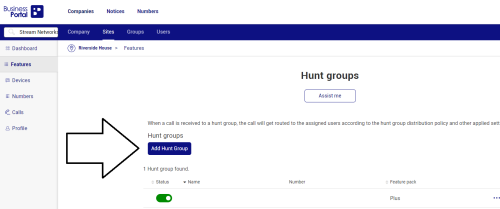
Click on hunt groups and on the next page click on add hunt group
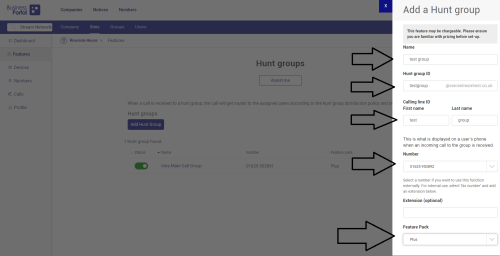
Next give your Hunt Group a name, pick a telephone number from the list of available numbers (keep a note of the number of the hunt group as you will need this further down the line for the auto-attendant set-up), choose an extension number if you wish, choose the “plus” feature option and click “continue”.
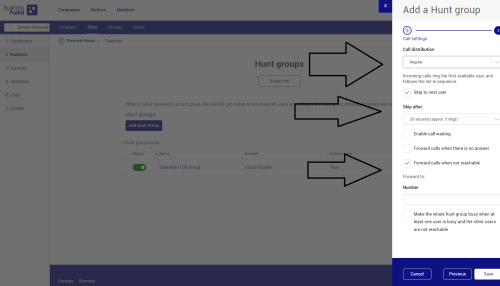
On the next screen choose the type of call distribution required and any other options required and click on save.
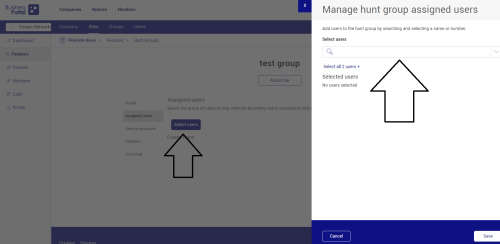
On the next screen choose which users you want to assign to the hunt group and click save. This has now set-up the hunt group option.
To set-up the VoiceStream BT Cloud Voice Auto-Attendant
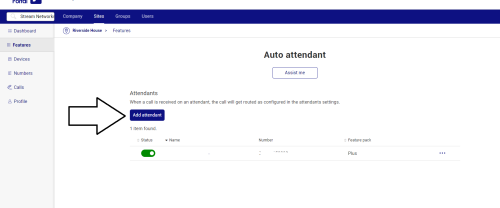
Go back to the site option in the Business Portal – Choose the relevant site and this time navigate to auto-attendant.
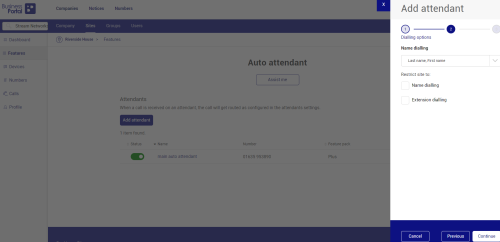
On the next screen click on “add autoattendant”
In the next screen give your autoattendant a name, pick a telephone number from the available DDI’s, choose the plus feature option and click “continue”.

On the next screen just click continue
On the next screen choose the schedule that applies to the autoattendant. Schedules can be configured in the company section of the main business portal and only apply to autoattendants. A schedule will enable a different message to be played on the autoattendant after business hours of during holiday periods. Click on save to save the autoattendant.

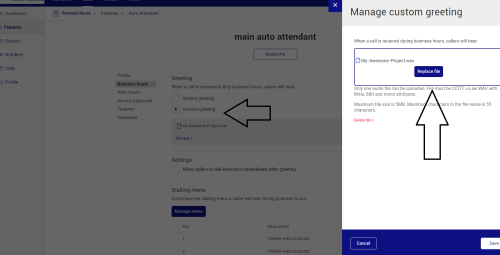
On the next screen we want to upload our autoattendant message e.g. press 1 for support, 2 for sales etc. You will need to prerecord you autoattendant message and convert into a .wav format and upload it from a PC or your mobile phone in this section.
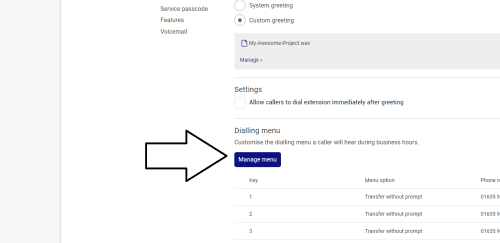
Next we want to configure our autoattendant options to divert the incoming call to the relevant department based on our autoattendant voice message e.g. please press 1 for support. Click on “manage menu”.
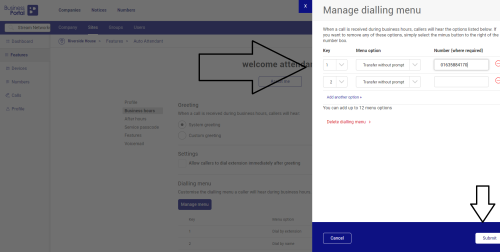
On the next screen choose a number e.g. if support is 1 choose 1 for the first option and then choose transfer without prompt and enter the telephone number or extension of the hunt group you set-up earlier or enter an individual users extension number if this options just goes to one person. Click “submit” and your VoiceStream BT Cloud Voice auto-attendant set-up is completed.
Want a competitive quote for VoiceStream BT Cloud Voice? Complete the contact form, use our chat function or call us on 01635884170.